How to connect MicroStrategy to Jethro
- Boaz Raufman
There are two methods available to connect MicroStrategy with Jethro:
JethroData 3.x connector
Applies to MicroStrategy Secure Enterprise 10.4 (hotfix 5 or later applied), and MicroStrategy Secure Enterprise 10.9 or later.
Full instructions (and a video) can be found here:
https://community.microstrategy.com/s/article/JethroData
Short instructions:
Install database object
1) Download and copy the connector file (JethroData.zip) onto the machine hosting the MicroStrategy Secure Enterprise installation.
2) Extract the zip file to its own directory, separate from the existing MicroStrategy installation files (example: /tmp/JethroData or C:\JethroData).
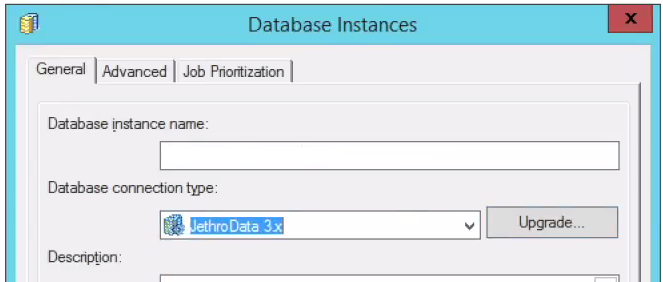
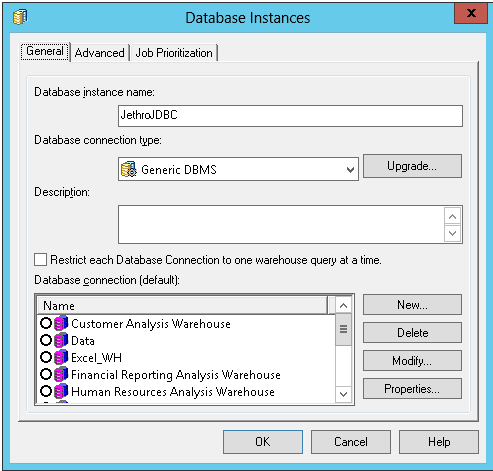
3) Launch MicroStrategy Developer and login to a 2-tier project source. Go to Database Instance Manager, and edit the warehouse Database Instance. Click on the 'Upgrade' button located next to 'Database Connection Type' as shown below:
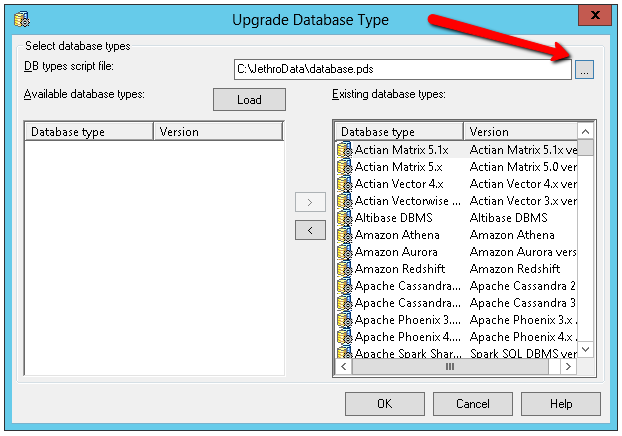
4) Choose the PDS file extracted from the zip file downloaded on step 1. Click on 'Load', mark the database type added on the left, and click on '>'. Click OK
5) Select JethroData 3.x as the Database connection type
6) Set the connection details to Jethro server, as described in the Generic DBMS section (without choosing Generic DBMS as the connection type).
7) Save the Database instance, and reload the projects using it.
Install data type mapping on each Intelligence Server in the cluster
8) Find the location of the dtmapping.pds file of the Intelligence Server installation, and set that location to your working directory in the command line.
- On Windows the default location is "C:\Program Files (x86)\Common Files\MicroStrategy", also referred to in the $MSTR_CLASSPATH environment variable
- On Linux the default location is "/opt/mstr/MicroStrategy/install"
9) Run the following command replacing <location> with the location of the contents of the extracted JethroData.zip file:
- Note: Running the command requires the privileges to copy and modify the existing dtmapping.pds file
- Note: the command will create a backup of the original file in <location>.
java -jar "<location>AddConnector.jar" --target dtmapping.pds --file "<location>dtmapping.xslt"
10) Restart Intelligence Server.
Install the connector on all of the MicroStrategy Web machines in the cluster
11) Find the location of the DBProperties.xml file, and set that to your working directory in the command line. This location will be different depending on the application server used. The following are common examples of the path to the DBProperties.xml file, which can be found in the directory where MicroStrategy Web is deployed.:
- Microsoft IIS: C:\Program Files (x86)\MicroStrategy\Web ASPx\WEB-INF\xml\DBproperties.xml
- Tomcat (on Windows): C:\Program Files (x86)\Common Files\MicroStrategy\Tomcat\apache-tomcat-8.0.30\webapps\MicroStrategyLibrary\WEB-INF\xml\DBProperties.xml
- Tomcat (on Linux): /opt/apache/tomcat/apache-tomcat-8.0.43/webapps/MicroStrategy/WEB-INF/xml/DBProperties.xml
12) Run the following command replacing <location> with the location of the contents of the extracted JethroData.zip file:
- Note: Running the command requires the privileges to copy and modify the existing DBProperties.xml file
- Note: the command will create a backup of the original file in <location>.
java -jar "<location>AddConnector.jar" --target DBProperties.xml --file "<location>dbproperties.xslt"
13) After running the above command, please restart your application server.
Generic DBMS
There are two methods available to connect MicroStrategy with Jethro via a the Generic DBMS connector: ODBC and JDBC.
Choose one preferred type of connection, and then define it through MicroStrategy Developer as a Database Instance.
After that, a short configuration is required to be made on the VLDB settings.
This article will explain in detail, step by step, how to establish each type of these connection methods, and how to configure the required VLDB settings.
Creating an ODBC connection
1) Create an ODBC DSN connection (Instructions can be found here).
2) Open MicroStrategy Developer → MicroStrategy Analytics Modules → Administration → Configuration Managers → Database Instances
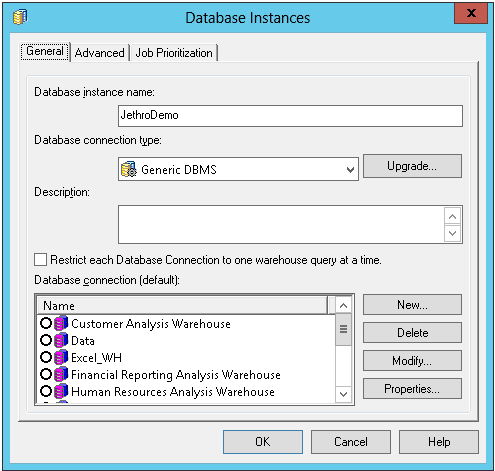
3) Create a new Database Instance
4) Under "General" tab → Choose "Generic DBMS" under "Database connection type"
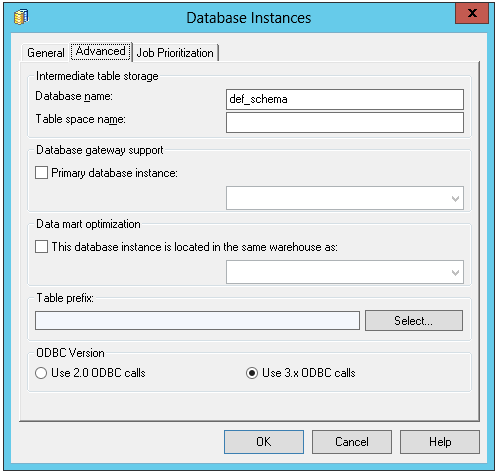
5) Under "Advanced" tab → Write "def_schema" as the Database name
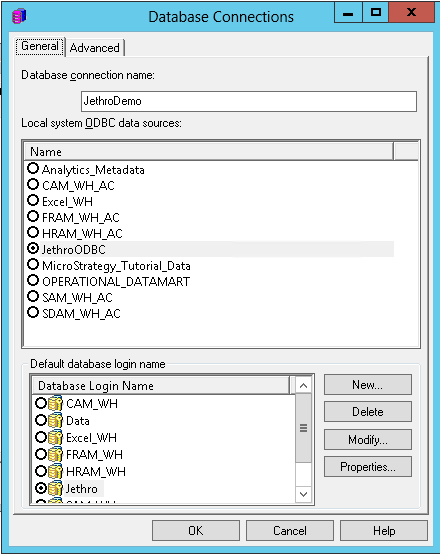
6) Go back to "General" tab → Create a new "Database connection"
7) Choose the ODBC DSN that was set in step #1
8) Create a new "Default database login name" (default values are user=jethro & password=jethro)
9) Click OK, and edit the VLDB settings for that Database Instance, as Described here.
Creating a JDBC connection
1) Open MicroStrategy Developer → MicroStrategy Analytics Modules → Administration → Configuration Managers → Database Instances
2) Create a new Database Instance
3) Under "General" tab → Choose "Generic DBMS" under "Database connection type"
4) Under "Advanced" tab → Write "def_schema" as the Database name
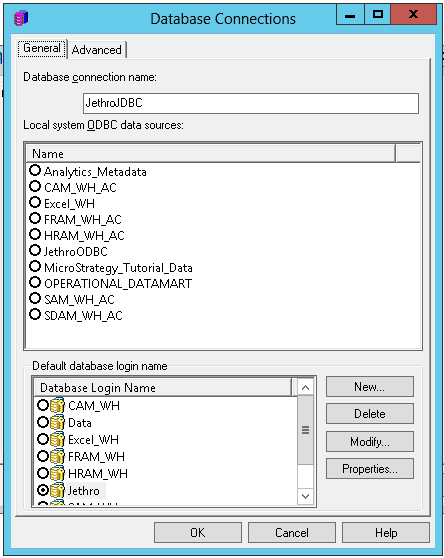
5) Go back to "General" tab → Create a new "Database connection"
6) Important - Do not choose an ODBC DSN connection! (leave it empty)
7) Download Jethro's JDBC files (Instructions can be found here)
8) Extract them into "C:\Program Files (x86)\Common Files\MicroStrategy\JDBC folder" (Or any other folder of your preference)
9) Go to Advanced tab, and use the following line as the connection string:
JDBC;MSTR_JDBC_JAR_FOLDER=C:\Program Files (x86)\Common Files\MicroStrategy\JDBC;DRIVER=com.jethrodata.JethroDriver;URL={jdbc:JethroData://<URL>:<port>/<Instance name>};
- Replace <URL> with your Jethro machine IP
- Replace <port> with your Jethro instance port (usually 9111, You can find it by running "service jethro status" on the Jethro Linux machine).
- Replace <Instance name> with the name of your instance.
- Don't use < or > in your final string.
For example:
JDBC;MSTR_JDBC_JAR_FOLDER=C:\Program Files (x86)\Common Files\MicroStrategy\JDBC;DRIVER=com.jethrodata.JethroDriver;URL={jdbc:JethroData://123.45.67.890:9111/demo};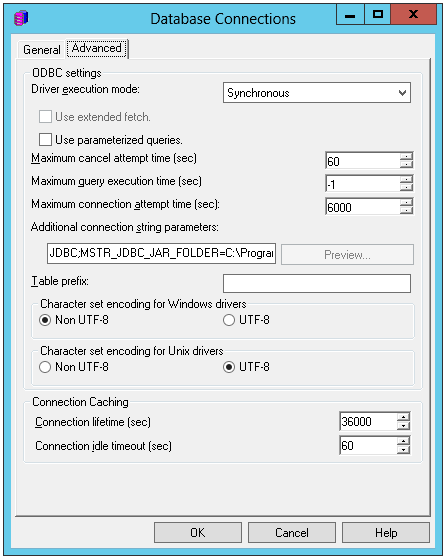
10) Create a new "Default database login name" (default values are user=jethro & password=jethro).
11) Click OK, and edit the VLDB settings for that Database Instance, as Described here.
VLDB settings Required
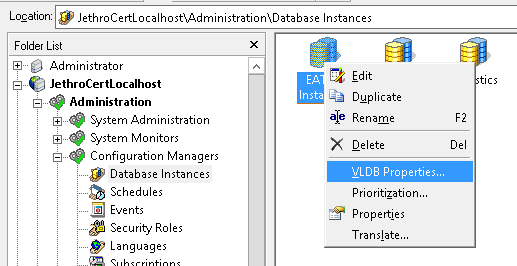
1) Right click on the desired Database Instance to be configures, and choose "VLDB Properties..."
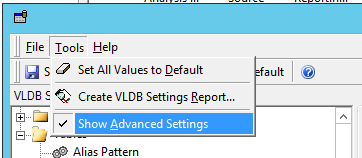
2) Choose Tools → "Show advanced settings"
3) Update the following two settings, to make sure that MicroStrategy will use derived tables when working with Jethro (Instead of Temp tables):
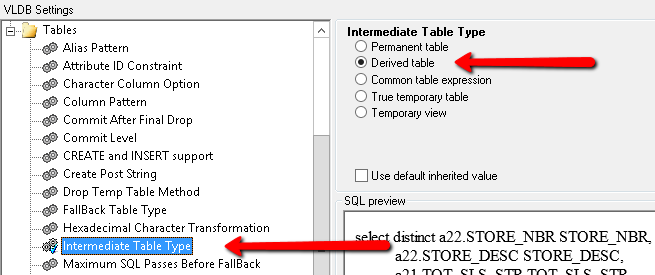
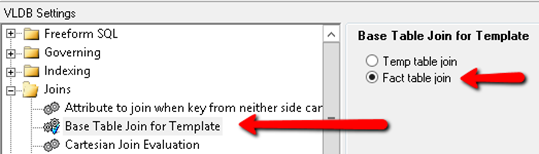
4) Click on "Save and Close"
In older versions of MicroStrategy, there were some rare cases where queries with temp tables were still sent to Jethro, even though it was set otherwise in the VLDB settings. If you ever experience such case, the workaround is to use "Temporary views" instead of "Derived tables" in the VLDB settings. If you don't experience these issue, it is recommended to stick with "Derived table", as its perfomance is better.
Warehouse Catalog Settings Required
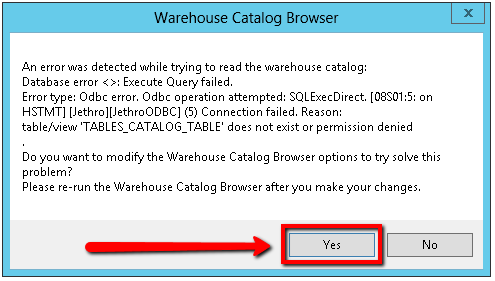
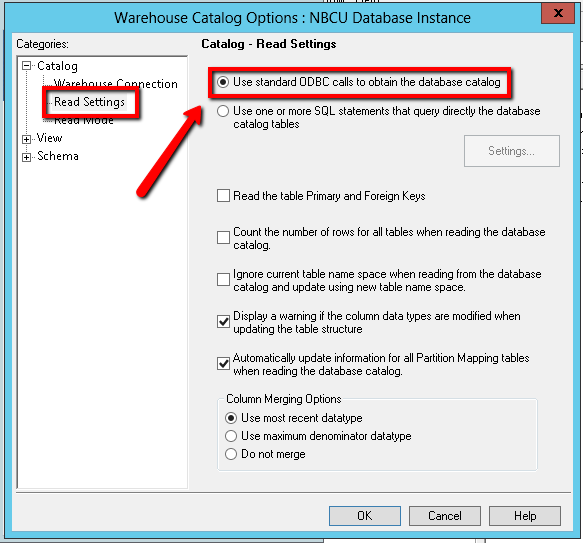
Sometimes during a project creation, or when using MicroStrategy Architect, MicroStrategy fails to read the warehouse catalog from Jethro. In such case, it is required to modify the Warehouse Catalog Browser options, and update the Read settings to "Use standart ODBC calls..." instead of "Use one or more SQL statements....".
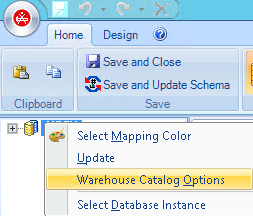
For existing projects, you can find the Warehouse Catalog options through the schema menu:
In MicroStrategy Architect, you can find it by a right click on the database instance: